How do I Make the Jewellery?
Introduction
While I've been doing photography and making digital art with it for many years, I only started making jewellery in 2015. I have no formal training, so have had to figure out all of my various processes myself - which is something I quite enjoy doing. It's great seeing my work improve and change over the years.
Currently my process has a few phases - eventually I'll include separate pages for each of these phases. What's described below is my process as of Fall 2023.
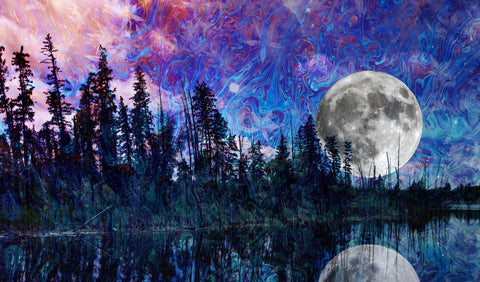
Creating the image
My images come from many sources - all either photos I've taken or images I've created. I draw a lot of inspiration from science and the natural world - so my images include things like
- Photos of smoke
- Photos of light reflected off soap film (soap bubble solution)
- Photos of flowers or insects in my garden
- Photos of the night sky - the milky way, northern lights, etc.
- Images created from public domain NASA data - observations from the Hubble Space Telescope.
Sometimes I directly use a single photo or image, but often I combine multiple images digitally to create a composite image.

Printing the Image
My process has evolved a lot here - I started out just printing on paper, but the results weren't very good. For a long time I printed on half-silvered plastic (made by airbrushing silver paint onto the plastic), usually with a layer of glowing resin behind it to make it glow in the dark. Many of the items on the site were manufactured this way.
Recently I figured out that I can airbrush a mixture of silver paint and glow in the dark pigment on the back of the plastic, giving a much thinner layer that still looks the same under normal light, and glows well. This allows me to make items that are thinner than I was previously able to make.
For each item, I identify the image I want to use, digitally cut it and shape it to the right size, and then print it using a pro-quality printer onto the plastic.
Selecting or Creating the Bezel
The bezel is the backing that the pendant image sits in. Some of my items (described as having a silver-plated brass bezel) use bezels that I purchase, but many of them are in bezels that I make myself.
At a high level, I come up with the 3D model of the bezel that I want, 3D print it, make a silicon mold of it, and then use the mold to make bezels using a variety of 2-part resins and pigments or fillers to give them different finishes. This has been a big area of experimentation for me over the last few years, and you can find out more here.
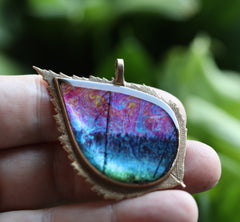
Creating the Item
The final step is to take the printed image, cut it out, and place it in the bezel. I then pour a 2-part epoxy resin over it to seal it in - which creates the final piece. More details on this part can be found here: